Long time Studio Artist users know that i’m a big fan of looking for ways to use Studio Artist to emulate various archaic printing technologies of the past. Richard Benson’s book on ‘The Printed Picture’ has a section that talks about the use of the pantograph in the 19th century to make reproductive etchings of commemorative relief medals, which were basically metal casts made to honor notable occasions and famous people.
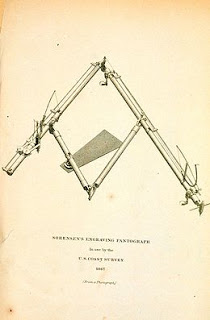
The pantograph was a mechanical device primarily designed and used to reproduce a physical drawing at a varied scale.

But for these particular historical etchings that reproduce a 3 dimensional relief medallion as a printed 2D image, the pantograph translated vertical modulations of the medal’s surface into variously spaced lines scored into an etching ground, which was then used to make the etching print. Another way to think about this is that the physical height of the metal surface modulated the spatial positioning of the etching line as it was traced over the course of the drawing surface.
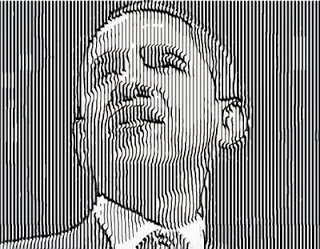
So having read this fascinating explanation of this obscure historical process, it seemed like a no brainer to knock off some pantograph relief etching simulations using Studio Artist’s vast artistic tool chest of presets and features. I’ve included some simple examples here. The image at the top of this post is a little more sophisticated than the simpler pantograph simulation seen below. It incorporates an additional width modulation of the etching line also based on the source luminance.

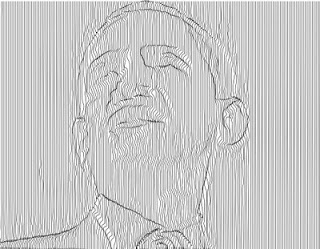
This simple pantograph simulation is just modulating the horizontal positioning of the vertical etching lines based on the local spatial luminance of the source image. You can click on the individual images to see them at full size, because the detail of the thin lines gets obscured when they are displayed at partial resolution in the blog text.
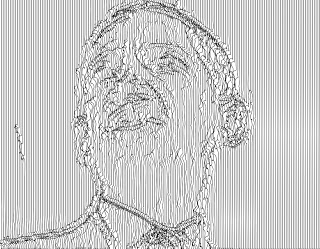
When i started this whole process i spent a lot of time trying to simulate creating a 3D relief image from the source image to use as the modulation for the pantograph. The Gradient ip op is typically one approach you could use to do that. So originally i was using a Gradient Ip Op processed version of the source image for the modulation. I used the Smooth ip op to clean up noise artifacts in the gradient image. But as you can see in the image below, the kind of modulation you get in the pantograph simulation is a lot more wiggly and while using source luminance is perhaps a cheater solution, it actually looked better to my eyes than trying to build a fake 3D relief of the source image.

So for this particular example the classic motto KISS (keep it simple stupid) applies. But i think you could generate some really interesting artwork by spending some time generating extreme image transformations for the pantograph modulation. A smoothed Convex Hull ip op for example might lead to some really interesting results. And i spent a lot of time working with combining the pantograph etching technique with other outline sketch effects and generated some great results. We’ll leave these advanced approaches as exercises for the curious for now.
All of these pantograph experiments can be found in the new Factory PASeq presets in upcoming version 4 of Studio Artist.


Someone pointed out that using displacement mapping on a Line Screen ip op in Studio Artist would be another way to achieve these kinds of pantograph effects. And indeed that is true.
Part of the reason i used the paint synthesizer approach was because my ultimate goal was generating a vector pdf file as opposed to a raster image effect.
There’s also an interesting relationship between the pantograph approach and the Rutt Ettra video synthesizer. They are both using modulated displacement mapping to create their particular stylized effect looks. I posted a Rutt Ettra simulation last year on the Studio Artist User Forum here.
Also, here’s another post that shows a similar kind of approach used for a woodcut effect in the paint synthesizer.