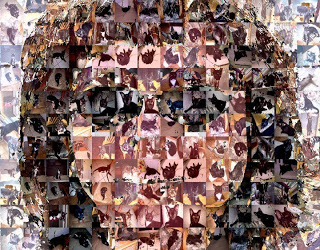
There’s an extremely wide range of different photo mosaic style photo effects that can be generated using Studio Artist. These include the traditional regular block photo mosaics to more exotic adaptive irregular shaped photo mosaics or even movie mosaics (movies made up of a collection of smaller movies).
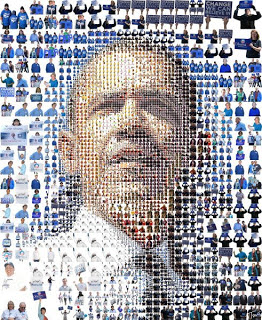
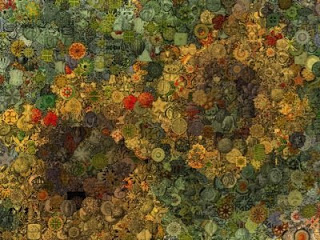
The image below is an example of a photo mosaic image created by Studio Artist user Charis Tsevis. You can check out more of his work here.
There are many different approach you can take to creating photo mosaic imagery in Studio Artist. This post will provide an overview of some of these different techniques.
To build a custom photo mosaic image in Studio Artist, you first need to convert a folder of your custom images into a Quicktime movie. Each frame in the movie file corresponds to one of your custom images. The movie file can then be used in Studio Artist as a movie source brush and/or movie background texture.
Converting a folder of images to a movie file is straightforward in Studio Artist. You build a simple 1 step Paint Action Sequence (PASeq) that sets the canvas to the source image. You then run the action menu command that processes a folder of images with a paint action sequence to a movie file.
Once you have a movie file containing the sub-images you want to use in your photo mosaic, you can then import that movie file as a movie source brush or movie background texture. The easiest way to do this is to use an existing photo mosaic preset and then run the ‘File : Paint Synthesizer : New Movie Brush…’ menu to import your custom movie brush to replace the existing one in the photo mosaic paint preset.
The 3.5 tutorial movie disk #2 includes tutorials on ‘Converting a Folder of Images to a Movie with a PASeq’ and ‘Photo Mosaic Paint Effects Using a Movie Brush’. These 2 tutorial movies explain the 2 step process i described above to creating a custom photo mosaic preset in much more detail.
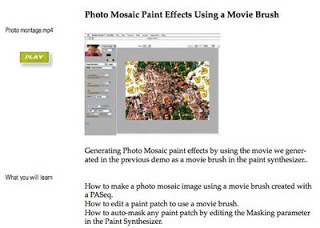
There’s also a section in the Studio Artist 3.5 User Guide on page 370 called ‘Using Movie Brushes to Generate Photo Montage Effects’ that explains the 2 steps described above.
There are a number of different paint presets in the ‘3.5 Collection’ and ‘Graffiti Brushes’ category that can be customized to create regular grid style photo mosaic effects.
To create irregular adaptive shape style photo mosaics you can use one of the path start regionize generators in the paint synthesizer along with the ‘region fill as brush’ pen mode. There’s a news blog post here that includes some example brick wall photo mosaic presets of this type. Again, you can easily customize these presets by using your own custom movie brush.
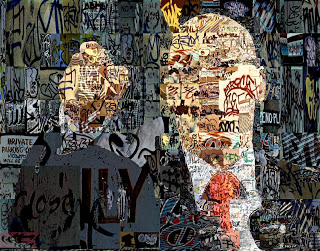
You can also use the Studio Artist Vectorizer or different Image Operations to create adaptive shapes from a source image that the paint synthesizer could then fill in with a movie source brush to create unique photo mosaic effects. Using the vectorizer to drive paint synth regionization is discussed here.
You can create movie brushes with embedded alpha channels. This is a different approach to creating non-regular photo mosaics where the individual images in the mosaic have individual shapes that are based on an alpha channel for each image. An example and explanation of how to do this is shown in this post. Note that you should use Safari to read this older blog (or if you use Firefox make sure your default text preference is set to something other than black to see the text).
Studio Artist 3.5 also ships with a separate application called MSG Evolver. MSG Evolver includes something called the Art Mapper, which can be used to create photo mosaic effects from a database of images. Instead of using a movie brush, you use a photo database created in Evolver to store your custom images. For more information on MSG Evolver check out this post. For detailed information on using MSG Evolver check out the MSG Evolver User Guide pdf.
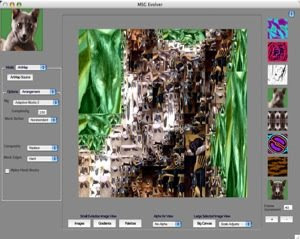
To create a custom image database you run the ‘Process : ArtMap : Generate Poster Index…’ menu. This menu command will ask you to select a folder of images and will then have you name 3 files it will generate (the poster, feature vector, and index files). These 3 generate files are the image database that Evolver uses to create photo mosaic effects. Once your image database is created, you can then use the ‘File : Preferences : Choose ArtMap Poster Index…’ menu command to select the 3 files associated with your image database. You can build different image databases that access different sets ofimages and use the preference menu to swap them in and out of Evolver.
You should read ‘Chapter 5: ArtMap’ of the MSG Evolver User Guide for more detailed information on using the ArtMapper. The section of this chapter titled ‘Working with Photo Databases in a Poster Index’ described in more detail how to generate a custom image database for use in Evolver as described above.
You can also use MSG Evolver to create movie mosaics (movies created from a collection of smaller movies). To do this you just build your Evolver database from a folder of movie files as opposed to a folder of images. For more information on movie mosiacs check out these links post and post1. You can also create movie mosaics directly in Studio Artist using a movie source brush and 2D indexing into the movie brush.
You can also use Studio Artist to create moving photo mosaic animations.
Note: Some of the links on this blog entry point to the old Studio Artist 3.5 blog. As mentioned above you should really use Safari to read those older blog posts. If you do use Firefox, you will need to make sure your Firefox default text color preference is set to something other than black in order to read the text properly.


