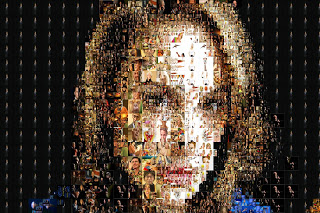
Studio Artist provides a large number of different tools you can use to build a wide variety of different photo mosaic or photo montage effects. The example above shows an adaptive photo mosaic effect, rendering one large image using a collection of different sized smaller sub images.
This tutorial will discuss some approaches you can use when working with Studio Artist to build photo mosaic images where the sub images are adaptively sized. Working with adaptive sizing is visually interesting, and can also lead to more representational photo mosaic effects where the placement of smaller sub images is used to better represent edge structure in the large mosaic image.
All of the examples we’ll be discussing in this tutorial were generated using the Studio Artist 4 paint synthesizer. The paint synthesizer is an extremely flexible environment for creating an endless variety of different paint effects and associated artistic styles. Building photo mosaic imagery is just a small part of the wide range of artistic effects the Studio Artist paint synthesizer is capable of creating.
You can create photo mosaic style imagery in Studio Artist’s paint synthesizer by working with movie brushes. A movie brush is a paint preset that incorporates a Quicktime movie file into the paint brush. When used to construct photo mosaic imagery you can think of the movie brush as being a container for a collection of images. Each frame in the movie brush is a single image in the image collection.
![]()
There are many different approaches you can take to putting together an image collection for use in building photo mosaic imagery. The images could be organized to present some kind of visual theme. The theme could be based on the representational content in the images, the textural or color qualities of the imagery, or the images could be totally random. It all depends on what artistic effect you are trying to achieve in your final output. And how you are going to possibly process the images internally in your paint synthesizer movie brush preset.
Traditional photo mosaic effects use the coloring of the individual collection images to reproduce color for local areas of the large output image. But Studio Artist does not restrict you to working this way. You can use the original coloring of the images in your movie brush to build your final output image. But you can also use the power of the paint synthesizer to appropriately colorize the component images of your movie brush as they are being positioned in the final output mosaic image.
One approach to colorizing your movie brush images on the fly as they are painted is to use the paint synthesizer’s Brush Load control panel. There are a large number of different image brush load colorization algorithms available to choose from. The screen snap below shows the use of the Paint Color Mean Shift algorithm.
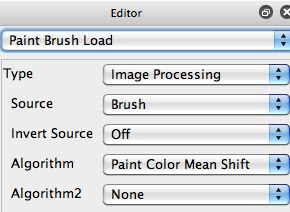
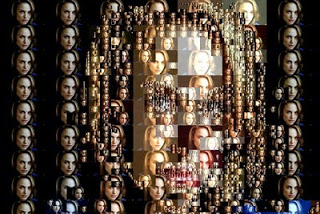
The extreme colorization example below shows a photo mosaic built from one self similar image that is recolorized as it’s positioned throughout the mosaic. It was generated using the paint synthesizer’s Paint Brush Load control panel settings shown above.
If you want to not colorize your image collection then you should choose the overall set of component images so that they appropriately reproduce the coloring of the larger image you want to represent in the photo mosaic. If you are recolorizing your movie brush images, then you can potentially ignore your individual component image coloring when putting together your image collection. Recolorizing is a powerful Studio Artist feature that gives you much more flexibility in putting together thematic collections of images since you can just focus on the content and not have to worry about also generating the appropriate color distribution in the image collection to accurately reproduce your output image.
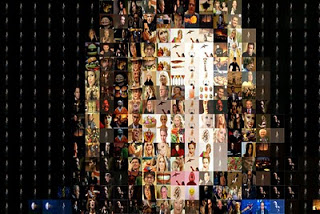
The simplest approach to building a photo mosaic image is to build a regular rectangular grid of smaller images that are positioned to represent the larger image. The example below shows off this particular approach. If you compare it to the adaptive grid photo mosaic image at the top of this tutorial you can see that the adaptive grid approach does a much better job of reproducing the source detail of the larger image we are trying to represent in our photo mosaic.
One of the simplest ways to build an adaptive grid photo mosaic is to work with multiple passes of the same movie brush preset. In each subsequent pass the brush size is reduced. If you want your smaller images to sub tile your larger images then you would want to reduce the size by 50% for each additional reduced size pass.
You have the option of working by painting in your additional reduced brush size passes manually or automatically. If you are working with manual painting, then you can turn on Studio Artist’s transparent onion skin display option to bring some of the original source image into the draw canvas as a transparent overlay. The source onion skin can be a useful aid when manually painting in smaller mosaic blocks at reduced sizes to build up edge and feature detail in your adaptive grid photo mosaic.
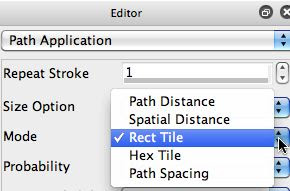
The paint synthesizer has automatic tiling parameter options you can turn on to insure that your manual painting will match up properly to your original tiling grid. The paint synthesizer screen snap below shows the Path Application control panel option called Mode set to the rectangular tiling option. Turning this option on forces the brush placement to automatically tile as you paint.
Manual painting can give you a lot of control over the final appearance of the adaptive grid photo mosaic. but it can be time consuming. An alternative approach is to use auto-painting for all of the reduced brush size passes. You can edit your movie brush paint preset so that it will focus drawing on source edges automatically, only drawing in those areas and ignoring other parts of the canvas as the reduced brush size auto-drawing takes place.
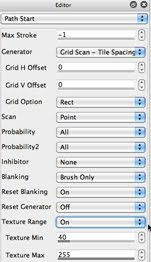
One approach that can be used to focus painting on the source edge locations in your paint canvas is to turn on the paint synthesizer’s path start Texture Range control option. The setting shown above focuses painting on source edge features. By increasing the Texture Min setting you focus painting on stronger images while ignoring weaker edge and flat regions of the source image.
To generate the automatic adaptive grid photo mosaic image shown at the top of this post i used 3 reduced size paint passes with my original grid tiling movie brush preset. For each of these subsequent paint passes i reduced the brush size by 50%. I also turned on the path start Texture Range option shown above, and increased the Texture Min setting for each of the subsequent paint passes. So progressively smaller brush tiles were painted at progressively stronger edge feature locations in the photo mosaic.
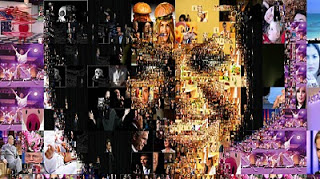
The example below shows another adaptive grid photo mosaic image automatically generated using the paint synthesizer movie brush techniques described above.
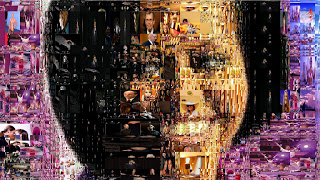
As mentioned above, the Studio Artist paint synthesizer is extremely flexible and is capable of creating an intense range of different stylistic effects. An alternative approach to building adaptive grid photo mosaics is to use the paint synthesizer’s path start regionize features to position variable sized image blocks to build the adaptive photo mosaic. The example below is one example of using the paint synthesizer’s adaptive block regionize path start generator to build an adaptive photo mosaic image. Note that using path start regionize generators to build your adaptive grid leads to a different kind of adaptive grid and associated flatter visual look.
For more information on building photo mosaic effects in Studio Artist you can check out this post.
For some example paint presets you can use to build photo mosaic effects check out this post. These examples show off applications of the paint synthesizer’s path start regionization features.
Here’s another post on photo mosaic art.
Here’s a Studio Artist 4 tip on how to build a movie brush from a folder of images.


