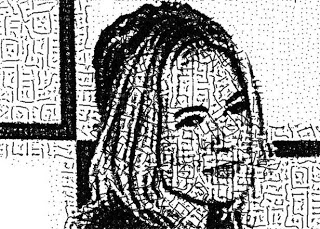
The previous post talked about how to build hatching patterns from Movie Pixel Indexing Background Textures in the Paint Synthesizer. But there are many other approaches to generating hatching patterns in the paint synthesizer. This post will explore the use of embedded bezier paths to define custom hatching patterns.
The particular factory preset we will be examining is the BezSmartHatch1 and is located in the Default : Auto Sketch category. It is designed to draw on a white canvas, so make sure you erase the canvas to white before using it. The example image at the top shows off how this paint preset renders an image in black and white. The hatching patterning is defined by a set of bezier paths stored in the internal path frame memory of the paint synthesizer. The set of 4 bezier paths used in this preset are shown below.
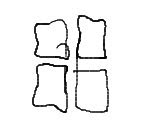
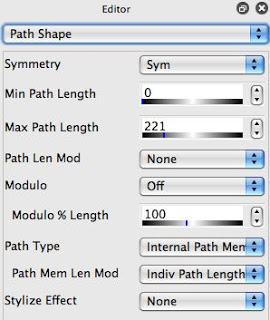
The bezier paths are used to define the path shape the paint synthesizer draws. If you look in the Path Shape control panel you will see that the Path Type is set to Internal Path Memory 1. This path type draws the complete set of bezier paths in the internal path memory for each auto-generated paint stroke. Using the Random or Cycle Internal Path Memory options would randomly draw 1 of the set of bezier paths, or cycle through them sequentially as individual auto-generated paths are drawn.
Blind drawing sets of hatch marks would eventually fill in the entire canvas with black hatching, so there needs to be an intelligent mechanism turned on to determine where to draw individual paths or more importantly when to stop drawing individual paths to best represent the source image. There are a lot of different ways to program this kind of behavior in the paint synthesizer. One could intelligently work with path start and path end settings to achieve this goal. However, this particular preset uses a WhiteCanvasErr Probability setting in the Path Application control panel.
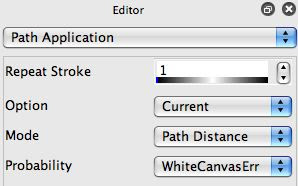
When this particular setting is activated, before an individual brush nib is rendered onto the canvas, Studio Artist determines if adding it will properly represent the source image at that canvas location. If this is true, then the nib is drawn. If Studio Artist thinks the nib will make the canvas too dark at that location, it skips drawing that particular nib and moves onto the next one. Remember, the settings in the Path Application control panel determining how nibs are applied from the generated internal path to the canvas.
To modify this paint preset to use your own custom bezier hatching, just go to Bezier Draw operation mode. Then draw a set of bezier paths you want to define your custom hatch pattern. Then record the current bezier path frame into the internal bezier path memory. If you now run the preset dsscussed above it will render the source image using your own unique custom bezier hatching pattern.
To illustrate this i drew the following custom hatch pattern in Bezier draw operation mode.

After recording this into the internal bezier path memory, i then ran the editied paint preset and got the following result. Note that the hatching has changed from the square patterning used in the original preset to the circles i used to define my custom bezier hatch pattern.
Version 4 has a new Path Shape feature associated with embedded bezier paths. This is the Cycle Internal Path Memory1 path type option. When this option is used to generate path shapes in the paint synthesizer, the set of individual bezier paths stored in the internal path memory are used as keyframes in an interpolated animation as individual path shapes are drawn. So you can define a set of keyframes for an animation and then have the paint synthesizer generate a complete interpolated animation off of those individual keyframes as it draws auto-generated paths. This can be quite effective when used with Time Particles.


