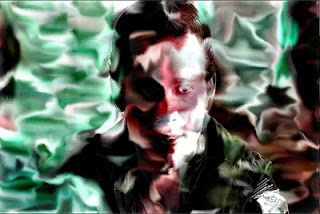
One of the great features of Studio Artist is that it gives you an unlimited number of different techniques you can use to build abstract images or videos. But sometimes you want to create a recognizable abstraction that still maintains features of your source image. Studio Artist also gives you many different tools you can use to take a totally abstract image and make it more representational. So you can take something very abstract and modify it to make it more closely resemble a specific image.
The example at the top of this post showcases what i’m talking about. It’s a frame from a paint animation. The paint style is fairly abstract, but the original image content is still recognizable. This can be especially important when dealing with source video facial features in a paint animation.
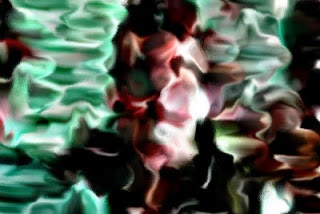
I started this project by using a single Studio Artist paint synthesizer preset that auto-rotoscopes a video file to produce a very abstract wet paint look. The image below shows off what you get by processing a single video frame with my soft wet look paint preset. Note that the painted image is very soft and abstract. There’s not a lot of feature detail in the abstract painting.
There are many different approaches to adding detail in a painting. A more conventional approach would be to continue subsequent paint passes using progressively smaller brush sizes to build detail in the painting. These additional paint passes could also be edited in the paint synthesizer to more closely focus on painting edge detail in the image. Auto masking features could also be turned on that automatically mask paint nibs to prevent edge or feature distortion. All of these different techniques will work to help generate a painting that more closely resembles the original source image it is derived from (like the image below).
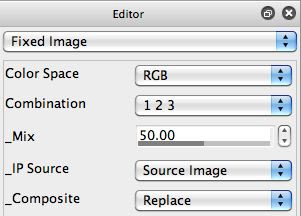
But for this particular example i thought it would be fun to not use any of those paint synthesizer techniques and to instead focus on other ways to add source image features back into an already abstract image. Probably the simplest approach is to just mix some of the original source image back into the abstract image. You can easily do this by using the Fixed Image Ip Op at the end of your Paint Action Sequence. The settings below for this image operation show how to generate a 50% mix of the source image with whatever is currently in the canvas.
The nice thing about this approach for source mixing is that you can do this without having to use multiple layers. The image below shows what you get when you use this approach with the abstract painting shown above.
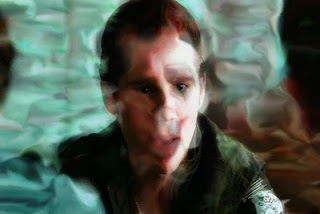
This source mixing approach can sometimes be very effective, it’s easy to understand,and is easy to apply to any abstract image. But it does soften the abstract image, and sometimes this might not be desirable. Not to worry, there are other approaches you can use that can add feature detail into an abstract image while still retaining all of the visual characteristics that makes the abstract image interesting.
One alternate i like is to use is a spatially modulated adaptive warp which when properly executed can add back some original source image edge representation. This is easy to do using Studio Artist’s interactive warp functionality. You generate an appropriate selection image and then use the Selection Modulate Rotate or Selection Modulate Translate interactive warps to warp the abstract canvas.
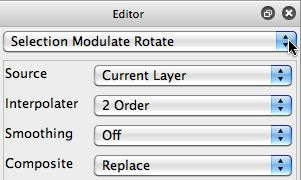
Using the source image as the selection is one approach. But for this particular example i wanted something that would only add edge features back into abstract canvas. So i generated a high spatial frequency representation of the source image (shown below) and made that the current selection.
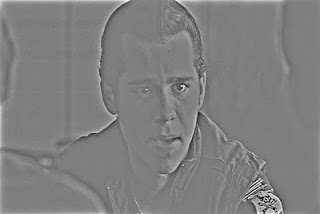
You can use the Equalizer ip op to do this. I set the ip op’s composite option to replace region selection. So when the ip op effect is run the result is directly placed in the selection buffer instead of the canvas. I then used the mouse to interactively warp the abstract canvas, using a warp option that modulates the warp based on the current selection image.
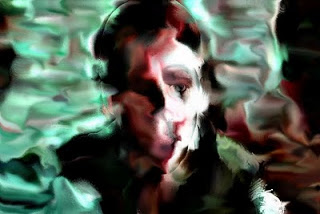
The image below shows off the result after using the Selection Modulate Rotate interactive warp. Note how it retains the original characteristics of the abstract paint field while also maintaining the edge feature characteristics of the original source image.
The great thing about Studio Artist is that it provides an extremely flexible and full featured environment to create your own custom digital paint, image or video processing effects. The techniques we showcased here are just a quick glimpse into the vast configurable visual effects toolbox available in Studio Artist.
I added one extra step to the movie processing by adding some of the high spatial frequency image we used as the selection image above into the abstract canvas after the interactive warp step. When generating a paint animation you also always want to try and add some temporal continuity from frame to frame into the overall process. I did this by overpainting on my previous output frame, and insuring that the new paint strokes only partially covered the old painting. Because parts of the old output frame are still exposed in the next frame there’s temporal continuity from frame to frame and hence reduced flicker in the resulting animation.
There are many other techniques you could use to build source representation and to reduce flicker in paint animations. The point of this particular tutorial example was to show that there are some fairly simple approaches you can use to take something very abstract and make it more recognizable. In a real project you might want to combine approaches like we describe here along with multiple paint passes or time particles to build your ultimate paint animation effect.
The video example below shows the final effect in a processed movie


