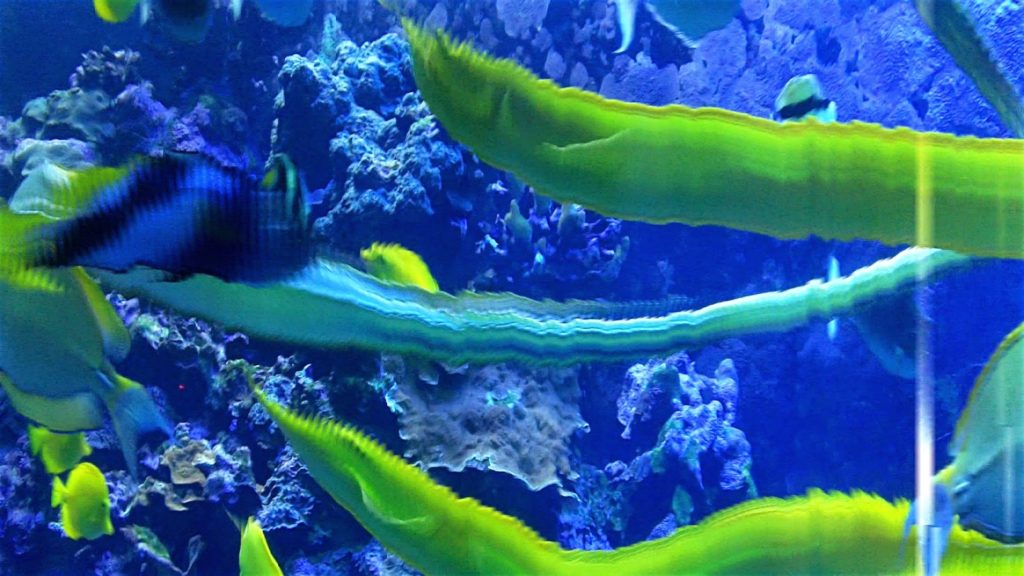
Wired magazine recently ran an article featuring a photographer who was trying to expand his horizons by lugging a desktop scanner underwater to capture slit scan imagery. As soon as i read the article, i realized that Studio Artist gives you the ability to do what this person is doing without the intensive requirements associated with lugging a desktop scanner around with you to generate slit scan images. You can do everything this photographer is doing and more just by using Studio Artist in conjunction with a portable digital video camera.
The image above is an example of an underwater slit scan generated using Studio Artist’s Temporal processing effects. Studio Artist’s Temporal Image Operation effects allow you to process multiple frames of a movie file to generate all kinds of different slit scan image effects. For the examples shown in this post, i used a small pocket sized Kodak Zi8 video camera. But you could also use other small portable devices like smart phones, or GoPro cameras to capture your movie footage out in the real world.
Once you have captured your video footage with a small portable video camera, then you can audition your recorded movie footage, and open it as a source movie in Studio Artist. You can then use one of several different slit scan temporal processing effects available inside of Studio Artist to create your slit scan imagery.
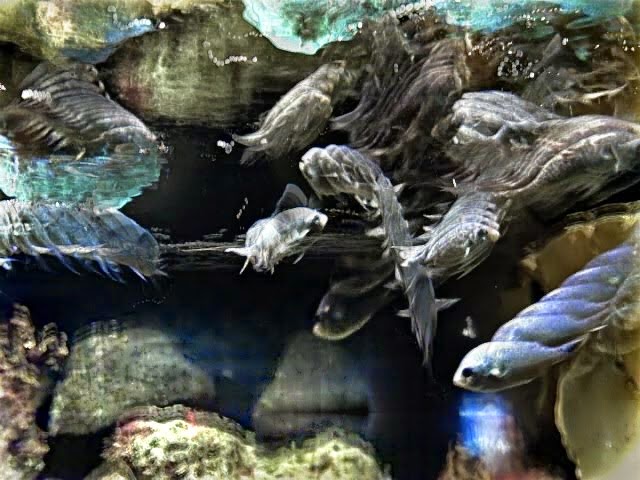
There are several advantages to working this way, as opposed to lugging around a physical desktop scanner to record your imagery. Working with small hand held video recorders allows you to take video footage in all kinds of different real world situations easily and effectively. Processing your movie files afterwards gives you the opportunity to try out different processing effects to achieve the best finished results with your recorded footage. And of course you can also apply other Studio Artist image processing effects to your slit scan imagery for even more creative potential. This could be as simple as running sharpening, noise smoothing, or contrast enhancement image optimization effects. Or more elaborate visual transformation, like repainting a slit scan image to give it a painterly artistic look.
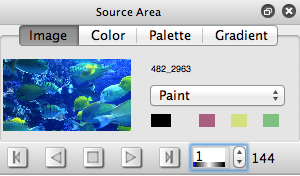
Let’s take a close look at how to create slit scan effects like those shown above in Studio Artist. To start you need to load a movie file into the source area of Studio Artist. The particular underwater footage we’ll be working with is a Quicktime movie file that is 144 frames in length. It is footage of fish swimming underwater. The video camera was held still while recording the movie file, so that the background stays constant while the fish move within that static background. I did this because i wanted to visualize the movement of the fish within the movie file in the slit scan images i wanted to generate from that recorded footage.
You can also generate different slit scan effects from video recorded from a moving camera. Again, it all comes down to what kind of time based movement or change you are trying to emphasize and visualize in your recorded movie footage with the slit scan processing. For example, if the video camera was panning, then you could generate panoramic imagery by processing it with a slit scan effect. For this particular set of images, the focus was on visualizing the motion of the fish in a static background scene.
Studio Artist 4 provides a number of different slit scan effect options in it’s Temporal Image Operation effects. These include the Temporal Scan Tracker, Temporal SlitScan Complete, and Temporal Time Axis Rotate Complete effects. The last 2 slit scan effects process the entire movie file loaded into the source area. The Temporal Scan Tracker is more versatile, in that it lets you work with a variable number of frames and variable spacing between adjacent frames used to create the effect. You can also process just a section of the source movie as opposed to processing the entire movie file.
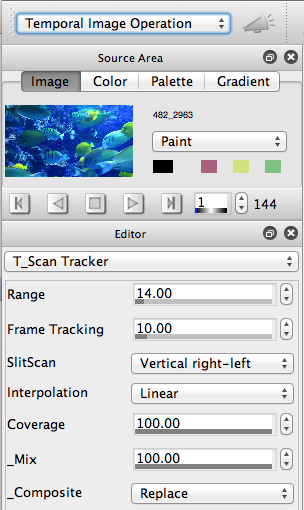
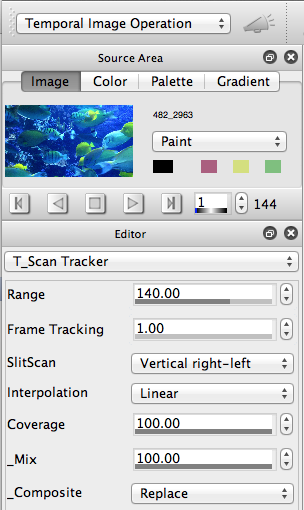
The primary motion of the fish in this movie file goes from right to left. So i specifically selected the Vertical right-left SlitScan option to try and track that movement direction in the source movie footage. Vertical means the ‘slit’ is a vertical one, and it will scan from the right side of the movie frame to the left side of the movie frame over the number of frames processed. The Range control specifies the number of frames processed. I used 14 frames and a Frame Tracking distance of 10 frames to quickly get a feel for what the effects was going to look like.
Frame Tracking is the number of frames between adjacent input frames to the effect. 14 frames each spaced 10 frames apart is 140 frames total, so we’re coarsely visualizing the object movement over essentially the entire movie file using these settings for the effect.
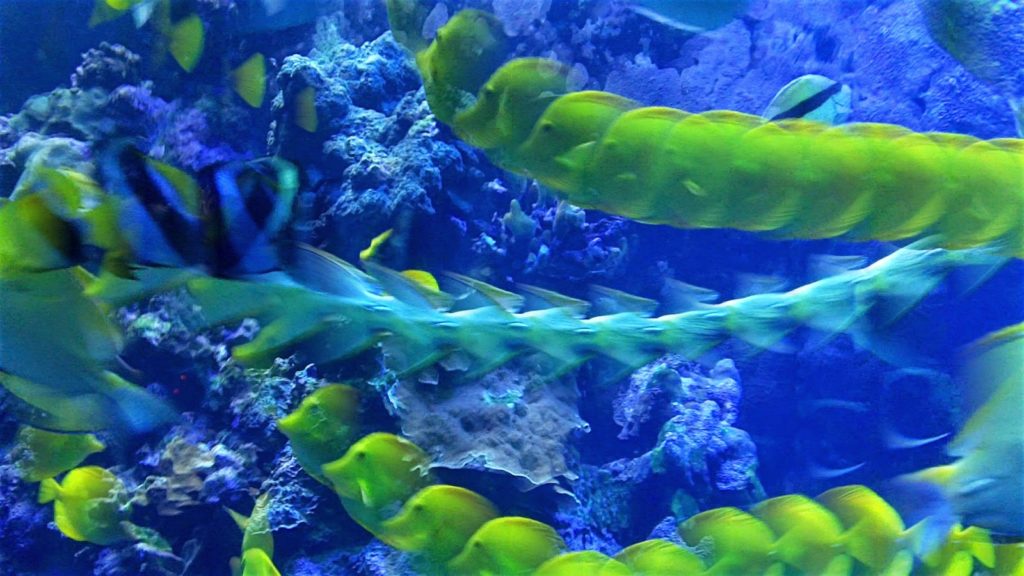
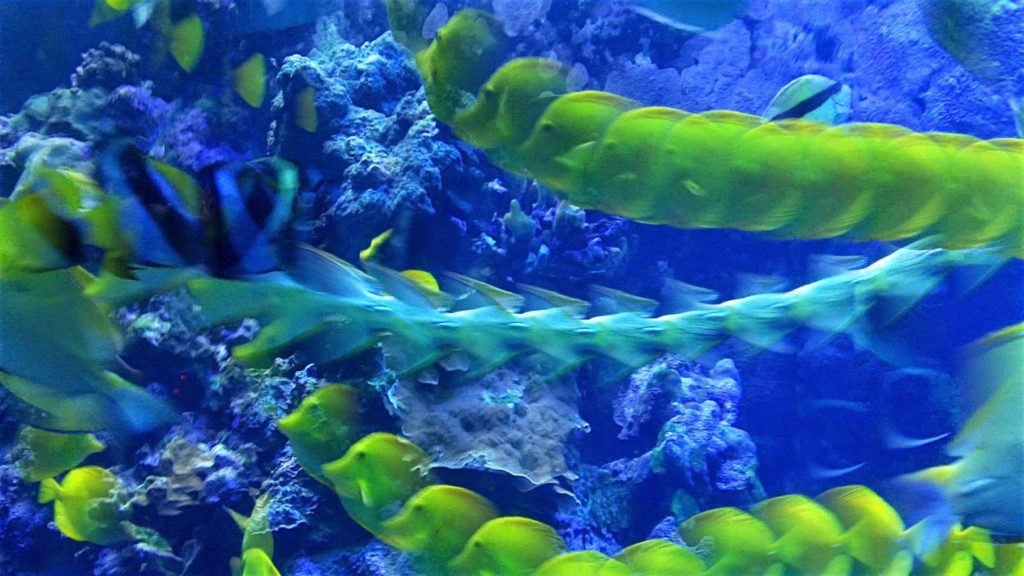
Because we are only processing 14 frames, you can generate the slit scan image very quickly. So this is good to get a sense of what a complete slit scan that uses every frame in the movie file will look like. The Temporal Scan Tracker is much more sophisticated than a conventional slit scan effect, because it uses a variable sized aperture into the source movie (as opposed to just a single pixel vertical slit).
For some movie files, a wide aperture coarse slit scan might be just the effect you are looking for. But for this particular example i wanted to do a full slit scan of essentially the entire movie file. So i used the settings below to process 140 frames.
The scan starts at the current frame time in the source movie file when running the Temporal Scan Tracker effect. So note that i have the source movie current frame set to the first frame. If you had a longer source movie file, and you only wanted to process some segment of it, then you could position the current frame time to be the start frame of the segment of the movie file you want to process with a temporal image processing effect.
As you can see in the above image, processing more frames with the Frame Tracking set to process each individual frame ends up with a finer mode detailed slit scan effect. Again, whether a coarse or tight scan makes the most sense for your particular movie file is going to depend on both the motion going on inside of your source movie file as well as what you are looking to achieve artistically in the slit scan effect output image.
Changing the SlitScan direction will dramatically change the temporal effect’s output. I tried using a Horizontal top-bottom scan direction with this same source movie file. This perpendicular scan direction (compared to our previous examples) output shown below looks very different than the original Vertical right-left scan output.
Depending on the particular settings for the slit scan effect you are generating, the processing time needed to produce the effect can vary. Obviously the more frames you are processing, the longer the processing time. There is a progress status message at the bottom right corner of the workspace that tells you how far you are into the overall processing needed to complete the effect.
If you ever want to stop a Temporal effect’s processing before it complete the effect, you can press the Esc key to stop it.
Studio Artist’s slit scan effects are much more sophisticated than traditional single pixel slit scan effects. The slit aperture automatically adjusts accordingly based on the number of frames you are processing and the canvas size. Supersizer interpolation is automatically running behind the scenes to scale everything appropriately to your designated canvas size, which can be different than the source movie size. And canvas size is not constrained by the number of frames you are processing like a 1 pixel traditional slit scan.
You can also choose the interpolation used between adjacent apertures (which can dramatically change the quality of the effect), as well as the aperture frame coverage. For this particular effect I wanted a Coverage of 100%. But if i was using a video pan to generate a panoramic slit scan image, then reducing the Coverage can generate a higher resolution panorama slit scan output image. Or you can tweak the Coverage control to generate special effects, like visual stutter.
So if you are interested in expanding your photographic horizons by working with slit scan effects you don’t need to carry a desktop scanner around with you everywhere to do it. Just use the portable video capture device of your choice, and then load the captured movie fields into Studio Artist’s source area, and you are ready to start playing with Studio Artist Temporal Image Operation effects to generate a wide variety of different artistic slit scan imagery effects.
We will be exploring the use of slit scan effects for generating artistic panoramic imagery as well as for exploring spatial re-interpretation of a visual scene recorded in a movie file in a future post.


