On the anniversary of it’s initial Sundance Film Festival premiere, I thought it was time to take another look at the making of the Studio Artist animated film Year of the Fish. What I love about Year of the Fish is that it’s a beautiful example of what a single individual can achieve working with Studio Artist and it’s automatic rotoscoping and paint animation capabilities. What Studio Artist is really all about is empowering individuals to create their own artistic styles and visual effects. Year of the Fish is really a stunning example of what an individual with some creative vision working with Studio Artist is able to artistically achieve.
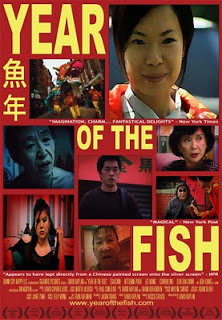
I recently spoke with director and Studio Artist user David Kaplan about the making of his feature length Studio Artist animated film Year of the Fish. David provided some interesting technical details on the making of the film. He’s also very excited about the upcoming Year of the Fish DVD release happening later this year.
What was your inspiration for doing the film?
Year of the Fish is a loose adaptation of an old Chinese fairy tale from the Tang Dynasty. Because I knew we wouldn’t have a lot of funding I wanted to do a very low budget film based in New York City where I live. So I decided to set the film in modern day NYC Chinatown. The initial script was developed at the Sundance Directors and Screenwriters labs.
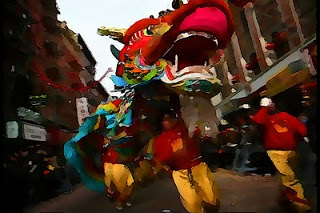
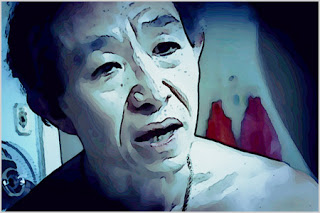
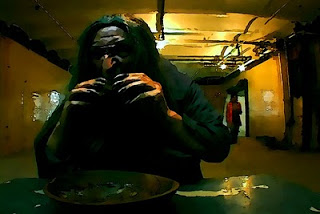
Because of our budget constraints we needed to shoot in standard-def video. But I wanted to turn that initial harsh hyper-realistic footage into something more lush and lyrical that would be presented in high definition HD resolution. I wanted to situate the film in a place somewhere between dream and reality. Instead of going for more and more detail with a photo-realistic look, I wanted to strip detail away to create a more impressionist feel. Studio Artist’s auto-rotoscoping paint animation features enabled me to take our initial standard-def video footage and reinterpret it as stylized impressionistic paint animation with high definition film resolution.
Were you inspired by other rotoscoped films like the ones created by Richard Linklater?
You mean Waking Life or A Scanner Darkly? Yes, Richard’s films were an inspiration. They are presented in more of a graphic novel style with very clean sharp edges and flat color. We certainly could have used Studio Artist to create a visual look like that. But I wanted to develop a much looser more impressionistic visual look for our film. One where colors spill across boundaries and melt into each other. A more painterly approach to rendering the animated film.
Richard’s films were also created by a very large team of individual animators who animated manually by hand over a long period of time to build up all of the rotoscope animation effects. It requires a huge budget to make a film like that, something that would have been totally impossible for us to put together. Studio Artist was really a revelation for me because I was able to create a complete feature length animated film working at my kitchen table in my apartment in NYC in a few months. I didn’t need a large team of animators to achieve the animation effects I wanted to create, I didn’t need to come up with the money to pay them, and I was able to work much faster than would have been the case if each individual frame in our feature length film was completely hand painted.
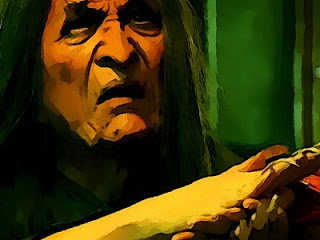
In hindsight I wish we had taken things further, made the final film even more impressionist and painterly. At the time I was a bit timid because I didn’t want the effects to get in the way of the story. Maintaining very distinct and coherent facial detail was a big concern as we developed the paint action sequence presets we used to render the film. And that’s something we were able to achieve when working with Studio Artist.
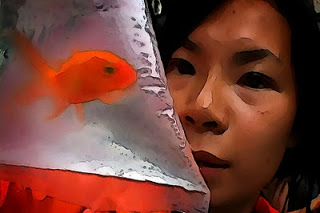
I certainly think you achieved your initial design goals in the final film. The paint animation looks stunning when seen on a large theatre screen. And as I watched the film I was continuously struck with how you utilized Studio Artist’s paint animation effects to help tell the story and set the mood of the film. I never felt like the animation was gratuitous or out of place, which is not something I can say about some other rotoscoped films I’ve seen.
Can you talk a little about the equipment setup you used to make the film?
The live action segments of the movie were filmed using a Sony DSR-PD170 standard definition camera. All of the film editing was done on a mac using Final Cut Pro Studio. Because the film is feature length and we needed to auto-rotoscope a lot of footage we put together a setup with 4 G5 Power Macs running Studio Artist for rendering the paint animation. We also used Wacom tablets for some additional hand touch up work using Studio Artist’s canvas movie feature where you can load a movie file into the canvas and then paint on individual frames.
How long did it take to render out the film? I seem to remember you did the initial work, and then after the film was accepted into Sundance you did a final pass at a higher resolution.
The rotoscoping process took approximately 6-8 months using 4 G5 Macs. I did a standard definition version first as a test run sketch and then redid all the shots in uncompressed HD 720 for our digital master, which we then up-converted to HD 1080 for festival screenings and eventual 35mm transfer for our theatrical release. There was a lot of experimentation at every stage and most shots were rendered several times over until a satisfying look was achieved. There was a lot of learning on the job so I think if I did it again, the process would take half the time.
New Studio Artist 4 runs much faster than 3.5, especially on more modern Intel macs. So if version 4 had been available when you worked on the film I think that would have sped things up quite a bit as well.
One thing i thought was very interesting was your use of custom color palettes to help set the mood for different scenes. Can you talk a little about how you worked with Studio Artist to achieve your custom colorization effects.
What I did was to find images online that had a certain color “feel” to them – say Van Gogh’s “Starry Night,” or Bruegel’s various winter or harvest scenes, or any work by Cezanne – load these into Studio Artist as a source image and create a color palette using “Generate Source Color Palette from Source Image.” Once this palette is created I could save it (Source Color Palette Export) and apply it to a new source image or video clip as part of my rotoscoping steps using Image Operations > Color Palette Map. This was particularly helpful when doing day for night scenes (all these scenes were created using the same color palette) or scenes that were shot in bright colorful summertime but were supposed to look gray and wintery; moreover, it gave a certain subtle aesthetic elegance to the overall color scheme of the movie.
I remember you also used Studio Artist to adjust the aspect ratio of your footage to match what you needed for the final film projection. Can you discuss some details about what you did to do that?
We were going from source video that was standard-def in 4:3 aspect ratio to HD in 16:9 aspect ratio, so I would use a canvas size of 1280 x 720 (16:9) and at some point in the PASeq I would do an interactive warp step to adjust/stretch the image accordingly in the canvas. Basically, we’d lose a little bit of the top or bottom of the frame – or both – but with the warp step in SA you can adjust each shot individually.
Did you do all the Studio Artist work yourself?
Mostly, yes – though I had a couple people help for a week here and there. Unfortunately, the film’s budget was too low to hire a team of people.
What percentage of the auto-rotoscoped footage was touched up via hand painting using the Studio Artist canvas movie features?
I’d say around 30%. We were able to achieve some wonderful and interesting effects via the auto-rotoscoping. I would have liked to have done more hand/detail work but we simply ran out of time.
Any words of advice for someone looking to put together a rotoscoped animated film project? Any technical issues to be aware of?
It’s very important to shoot progressive live-action footage. I did not, and the subsequent de-interlacing took a lot of time and effort.
Also, if you plan to work with uncompressed HD footage, as we did, you’ll need a RAID array to handle the data transfer for playback; firewire won’t cut it.
Further, if it’s a high-def project, I would highly recommend working in HD 720 (1280 x 720) rather than HD 1080 (1920 x 1080) for any rotoscoping work – a 1080 frame size is simply too unwieldy to manage. Render times go way up and there isn’t the ability to play around and experiment the same way.
It would be interesting to see if you felt the same way about working directly at 1080 when working with Studio Artist 4 on modern intel machines. I find myself gravitating towards larger frame sizes these days when designing paint action sequences for effects due to the increased processing speed of Studio Artist 4 running on todays macs. Even Studio Artist 3.5 runs faster in emulation mode on a modern intel mac than it does on an older PPC machine.
What in particular did you like about working with Studio Artist?
The range of possible visual styles you can create with Studio Artist is basically infinite. One can go very organic and flowing with the look. And there’s room for an incredible amount of experimentation. With Year Of The Fish, I was a bit timid with the look. On the next film I do with Studio Artist, I would go even more dreamy and painterly – I’d take it really far out there.
What are you working on now?
I’ve just finished a science-fiction short film for PBS called “PLAY.” It’s about video games in the future. Now I’m writing what I hope will be my next feature film. My website www.kaplanworks.com has information about my various projects.
We’ll keep you informed on the upcoming DVD release for Year of the Fish.
You can check out the Year of the Fish trailer video here.
Here’s a set of technical specs for all of the equipment David used when working on Year of the Fish.
Tech specs for YEAR OF THE FISH.
workflow:
– shot on miniDV DVCAM (Sony PD-170)
– edited standard-def on Final Cut Pro
– picture locked
– rotoscoped at 720p24 HD resolution via Studio Artist to create HD digital master
– sound mix, titles, and final color tweaking
– transfered to HD tape and 35mm film for projection
software:
– Final Cut Pro Studio (v. 5.1)
– Synthetik Studio Artist (v. 3.5)
equipment:
– Sony PD-170 video camcorder
– Sony DSR-11 DVCAM deck
– Power Mac G5 Dual 2.5 GHz (4 GB RAM) (for standard definition editing)
– 4 other Macs (for HD rotoscoping/rendering):
– Power Mac G5 Dual 2.7 GHz (4 GB RAM)
– 2 Power Mac G5 Quads 2.5 GHz
– Mac Pro Intuos Quad
– (all the macs had about 4 GB RAM and good graphics cards like the ATI radeon x850 XT 256MB)
– Xserve RAID (14x400GB) (for HD editing and storage)
– Fibre Channel PCI-X card (to connect to RAID array for fast HD data transfer)
– Blackmagic HD Pro 4:4:4 Card PCI-X
– Blackmagic HDLink (for HD monitoring)
– Apple 23″ Cinema Displays (for each station)
– Sony PVM-14L5 Analog Studio Monitor (for color correction)
– 2 Wacom Intuos 3 9×12 tablets (for rotoscoping)


